Dinosaur Dyed Pasta Craft for Kids
by Karen & Grace Morris
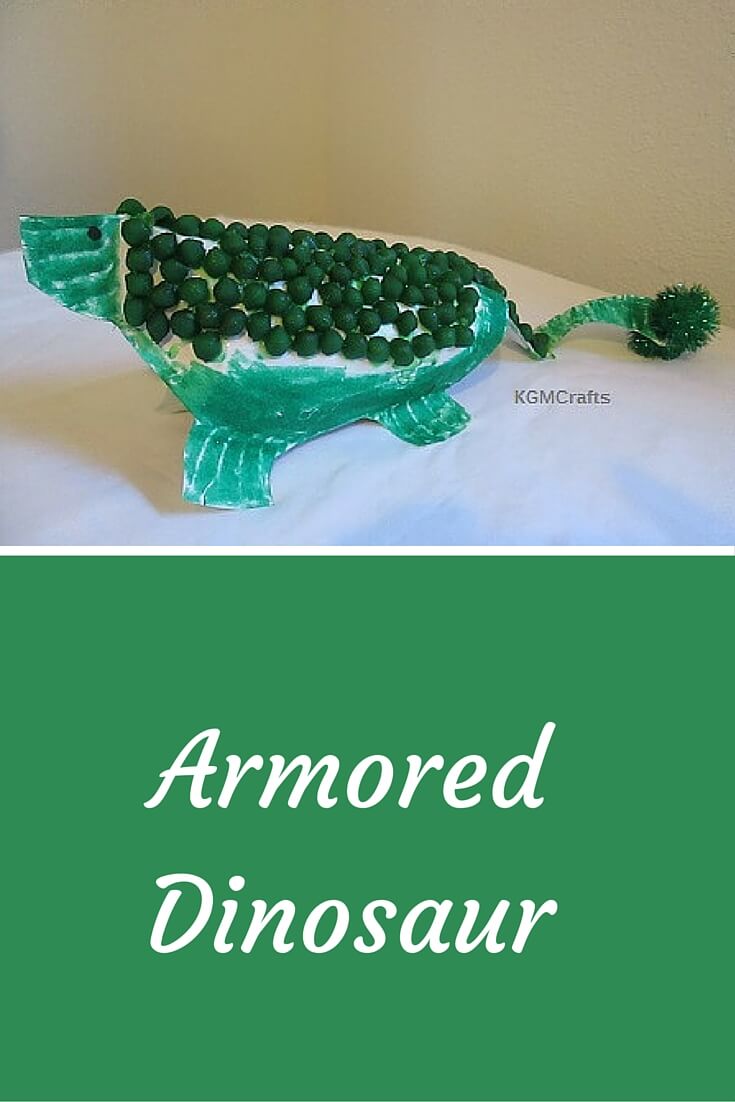
This dinosaur dyed pasta craft is a great for a school project.
Have you heard about the ankylosaur? It had bony plates that were embedded in the skin. They also had a club on the tail.
When you make an armored ankylosaur, you can try out a new craft technique.
Recipe for Dyed Pasta
The recipe calls for two cups of pasta. For this project you do not need that much, so we will cut the amounts down. To make one cup, you will need;
- 1 cup of pasta,
- 1/2 teaspoon of rubbing alcohol,
- 1/2 teaspoon of green liquid food coloring
Place the pasta and dye in a Ziploc bag. When the pasta is colored, dumped it on a paper towel on a cookie sheet.
The pasta will turn a dark green (Ahhh! The pasta! It’s turning green!). Do not eat the pasta! The dye uses rubbing alcohol.
Directions for Dinosaur Dyed Pasta Craft
Materials you will need:
- Dyed pasta
- Paper plate
- Two empty toilet rolls
- Glue
- Marker to match dyed pasta
- Sparkly pompom
- Stapler
To make the dinosaur shape, fold a paper plate in half.
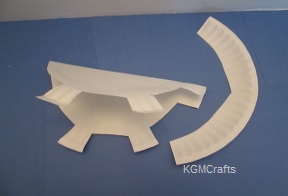
To make the head and legs, you will be cutting off part of the rim. From the fold, measure 1 inch and make a line to the rim of the plate. This will be the head of your dinosaur. Now measure 2 inches from the line and cut out the rim. Leave a 1-inch piece of the rim. This will be the front legs. Measure 2 inches and cut. Leave another 1-inch, this will be the back legs. Now cut the rim off from the back legs to the fold.
The larger rim piece will be the tail. After about 2 1/2 inches narrow the tail and then rounded the tip. Staple the squared end to the back of the dinosaur. Glue a 2-inch piece of paper plate to the back of the tail near the body. This will give the tail some extra support. Glue a sparkly pompom to the top and bottom of the tail.
Ankylosaur had a club on the end of their tail. They may have used it to defend themselves.
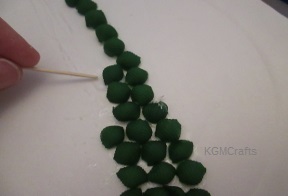
Glue your pasta to the back and part of the tail. Leave the sides and part of the tail free of pasta. Using a toothpick to place the pasta is helpful. Your fingers will not get as sticky. After the pasta is in place, fill the cracks with glue. Let dry.
The pasta shells look like armor. The dinosaur’s armor was similar to the armor of today’s crocodiles and armadillos. It is a bony substance that forms within the skin.
When the glue is dry, then color dinosaur with a marker. Or you could use paint.
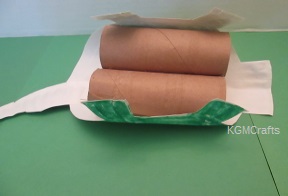
Staple two toilet rolls together. Next, carefully fold your dinosaur around your toilet paper rolls. Staple a front leg on one side. Turn your dinosaur around and staple the back leg.
Now add facial features to your creature.
Your dinosaur dyed pasta craft is ready. Place it in your dinosaur scene, or you can set him on your desk to keep you company.
