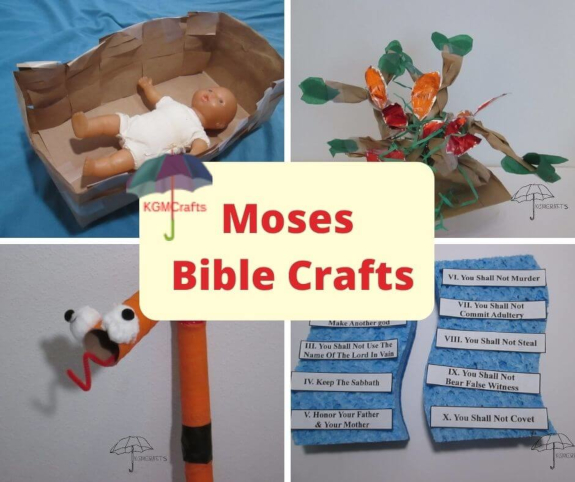
Moses Bible Crafts Educational, Enjoyable
by Karen & Grace Morris
Learn while doing Moses Bible crafts! A short story is included with each activity.
Your kids will follow this man's life from the time he was a baby in Egypt to leading the people across the Red Sea.
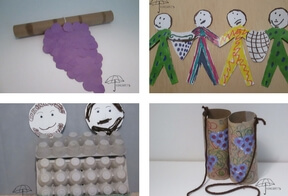
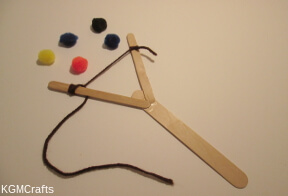
The pictures below will take you directly to the Moses Bible crafts if you want to read the story, then scroll down to read the page
From being a baby floating down a river, seeing a burning bush, going before Pharaoh, and leading a people to the promise land, Moses had an interesting life.
Moses' Birth
Jacob’s family was hungry because of a famine. He sent ten of his sons to Egypt to buy food. When they learned that their brother Joseph was living there, Jacob’s family decided to move to Egypt. (Genesis 42-45)
Jacob’s family continued to live in the land and grew powerful and numerous. In time a new Pharaoh ruled Egypt who did not know Joseph (Exodus 1:8)
This Pharaoh was afraid of the Israelites and made them slaves. He became afraid that the Hebrews might rise up and fight against him. The Pharaoh developed a plan. He would kill all the boy babies. (Exodus 1:9-22)
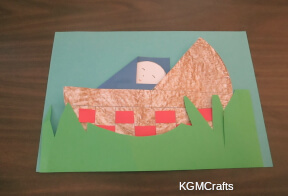
An Israelite mom didn’t want this to happen to her son. So she made a basket out of bulrushes. She put her baby boy inside and placed the basket in the Nile River. (Exodus 2:1-4) Her daughter Miriam watched the basket from the side of the river. What would happen to her baby brother?
The daughter of Pharaoh was bathing in the river. She heard a noise. She sent her maid to look. What they found was a basket among the reeds. The baby was crying. She took pity on the child and raised him as her own. She named the child Moses, because she drew him out of the water. The name of Moses means to draw out. (Exodus 2:5-10)
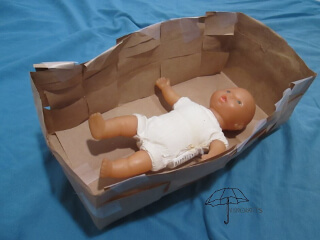
Moses Bible Crafts the Baby Basket
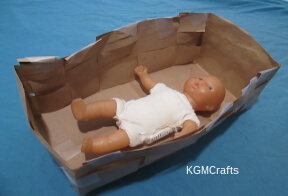
Use a paper bag to make a woven basket.
You will need;
- Lunch size brown paper bag
- Tape
- Scissors
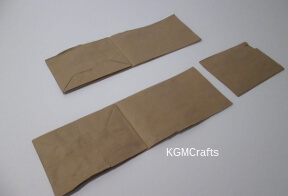
Keeping your lunch bag folded, cut it in half from top to bottom. Also, cut off approximately 4 1/2 inches from the top of each piece.
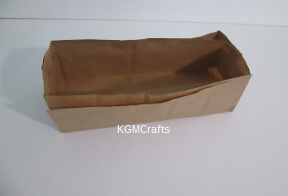
Unfold each piece. Each piece will have three sides that point up, two long sides and a short side, and a bottom piece.
Place one piece inside the other so that it looks like a basket. Place a piece of tape on each of the short sides.
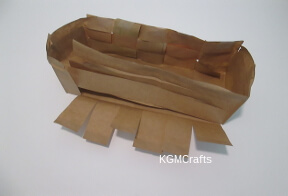
Now, most baskets are woven, so you will want to weave the long sides. Each long side should have two pieces.
On one piece, measure about an inch from the folded edge and cut vertically to the bottom fold. Make about three more vertical cuts so that you have five pieces.
On the other piece, cut on the long bottom fold. Then make two more horizontal cuts evenly spaced. You will have three strips. You can color the strips if you want.
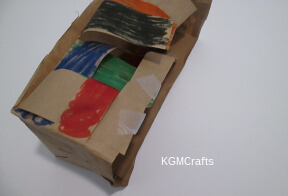
After your strips are cut, weave the first vertical strip over, then under, then over the three horizontal strips. Tape the strip to the top horizontal strip. For the second vertical weave the strip under, over, and under, tape to secure.
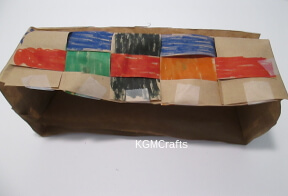
Continue the pattern.
Do the same with the other side.
Your basket is done. It won’t hold more than a small doll and won’t float, but it will show you how to weave paper.
The Burning Bush
When Moses grew up, he didn't like the way the Hebrews were being treated. One day he saw an Egyptian beating a Hebrew. So he killed the Egyptian. Moses was afraid and ran to the land of Midian where he got married. (Exodus 2:11-22)
One day, Moses was keeping the flock of his father-in-law. He led the flock to the west side of the wilderness and came to Horeb, the Mountain of God. He saw an unusual sight.
An angel of the Lord appeared to Moses in a flame of fire out of the midst of a bush. The bush appeared to be burning, but wasn’t consumed by the flames. Moses was curious about this great sight and went to see it.
When he got close, the Lord told Moses that he was standing on holy ground and to take off his sandals. Moses did what he was asked. Then the Lord told Moses to deliver the Hebrews out of Egypt. (Exodus 3:1-22)
How to make a burning bush
without using fire:
Another Moses Bible Crafts that uses paper bags.
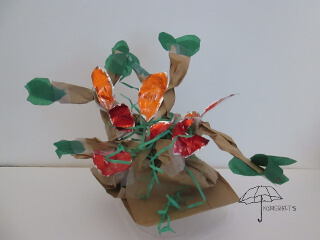
Supplies;
- 2 brown paper lunch bags
- Green shredded gift bag filler
- Green tissue paper
- Aluminum foil
- Yellow, red, orange permanent markers
- Tape
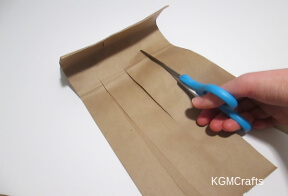
Cut the paper bag in half up to the folded bottom. Cut the bag again so you have four strips.
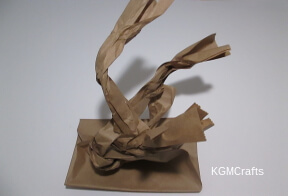
Twist all the strips to look like branches. Twist and tuck them around each other. Do the same to the other bag. Tape it and entwine it with the other bag.
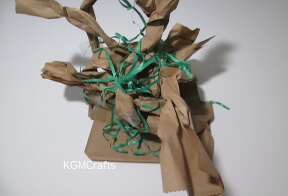
Take your shredded gift bag paper and put them on the paper bags branches.
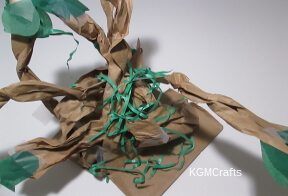
Cut out leaf shapes out of green tissue paper. Tape the leaves on the ends of the branches.
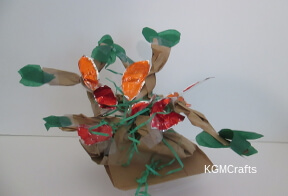
With your aluminum foil, cut flame shapes. Color them with your permanent markers. Let them dry for a few minutes so that they don’t smear.
Tape the flames to various places on your bush. When the light reflects off the foil, it will look like the bush is burning.
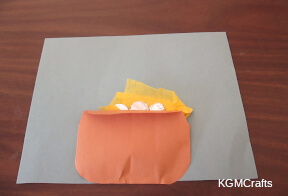
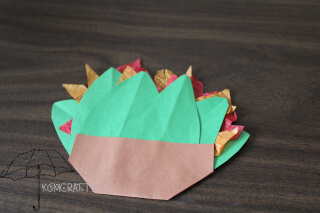
An Easy Burning Bush craft
You will need;
- Green construction paper
- Red tissue paper
- Orange tissue paper
- Glue stick
- Brown construction paper
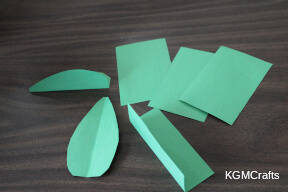
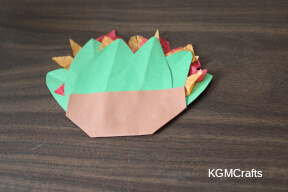
Cut six 4 1/2 by 3 inch rectangles from green paper. Round the top so that it looks like a leaf.
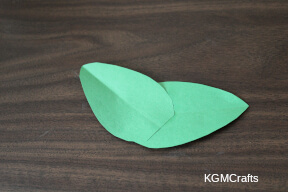
Glue two leaves together so that one points left and the other right.
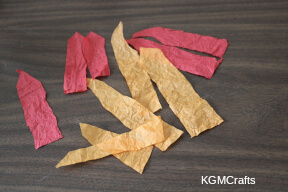
Cut 5 by 1 inch strips from red and orange tissue paper. The strips can be shorter. Cut the tops into a point so that they look something like a flame. You want to see the flames above the leaves.
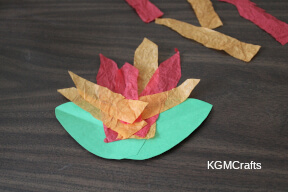
Glue some red and orange flame on two leaves.
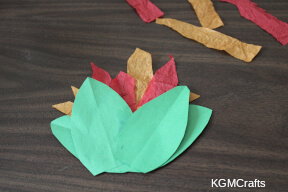
Add two more leaves.
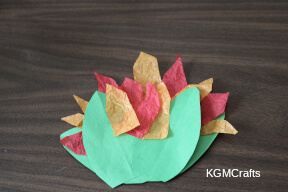
Add more red and orange tissue flames.
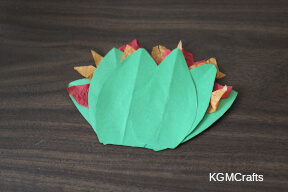
Add the last two leaves. You should have a plant shape.
Trim the flames some.
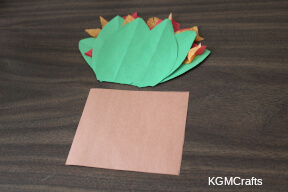
Cut a 4 1/2 by 4 inch rectangle from brown paper. Fold in half.
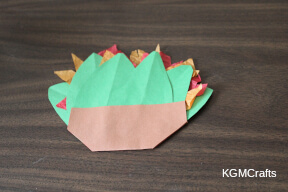
Glue to the bottom of the paper plant. Trim the sides of the brown paper.
Moses and his staff
God told Moses to use his staff to show the power of God to the Egyptians. God told Moses to throw his staff onto the ground and it turned into a snake.
Moses was afraid of the snake, but he did what God said to do. He grabbed the snake by the tail, it turned back into his staff. (Exodus 4:1-5 also see Exodus 7:8-12)
Moses Bible Crafts Make His Staff
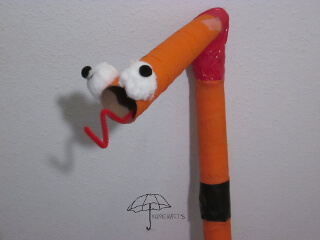
What you will need;
- Four paper towel rolls
- Red and black duct tape
- Red pipe cleaner
- Orange streamer
- Two cotton balls (jumbo size)
- Two mini black pom-poms
- Scotch tape
- Brown paper lunch bag
- Tacky glue
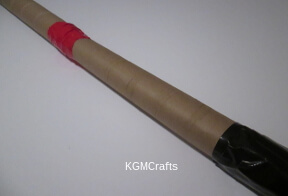
Take two of your paper towel rolls and duct tape the ends together. Take the other paper towel roll and duct tape it on top of the other two.
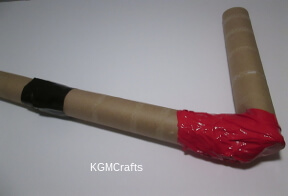
With your last paper towel roll, duct tape it in an angle from the top of the roll (so it looks like a "L" shape).
When you duct tape the paper towel rolls like above, do it in a pattern. Such as black, red, black or red, black, red.
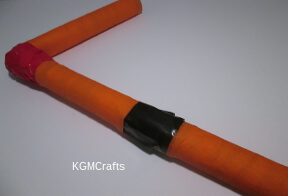
Tape the end of the streamer to the end of the paper towel roll with scotch tape. Wrap until you reached the duct tape. Then tape the other end of the streamer with scotch tape. Continue doing this until you no longer have any of the paper towel rolls showing.
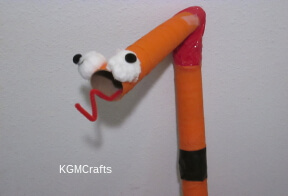
There! You have made a staff! However, Moses staff could turn into a snake. So we will need to add a few more features to our staff to do that.
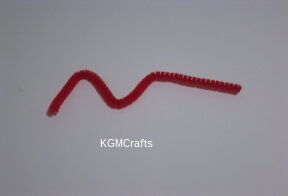
Cut a 6-inch red pipe cleaner. Twist it to look like a snake’s tongue.
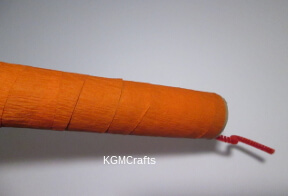
Tape it inside the hole of your staff handle.
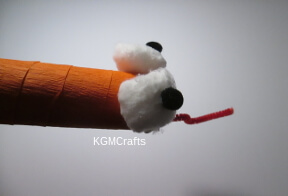
Glue your two cotton balls to the end of the handle of the staff. Glue black pom-poms on top of the cotton balls. Let dry.
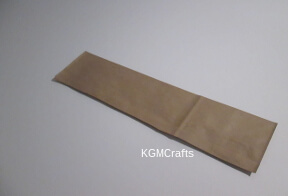
When dry. Cut a paper bag in half.
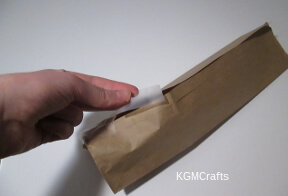
Open the bag and tape the cut edge.
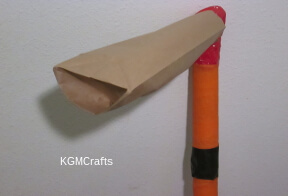
Put the paper bag over your snake's head. When you take the bag off, your staff will transform into a snake. This will be great to use in a Moses play.
The Parting of the Red Sea
When the people of Israel were leaving Egypt, they went to the Red Sea. The Egyptians came to destroy the Hebrews. So Moses stretched out his hand over the sea, and God divided the sea back.
In the Bible it says that there was a wall of water on the left and right while the Hebrews walked on dry ground. (See Exodus 14:1-30)
Make the scene in a bottle
one of the fun Moses Bible Crafts
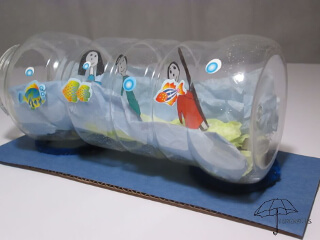
What you need;
- Plastic peanut jar
- Blue and yellow tissue paper
- Moses Bible Crafts PDF
- Markers or color pencils
- Fish stickers
- Tape
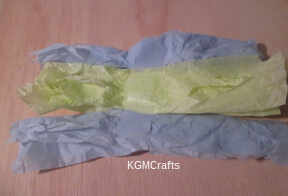
Cut a 5 by 7 1/4 inch piece of blue tissue paper. Fold it in half, then in half again until you have a piece that is 1 1/4 by 7 1/4 inches. Cut another piece of blue tissue paper the same size, doing the same thing. Do the same with a piece of yellow tissue paper.
Tape the tissue papers together with the yellow piece in the center.
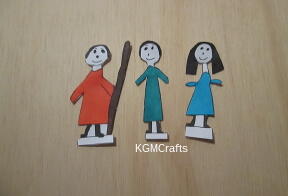
Print the people in the PDF. Cut your people out and color them.
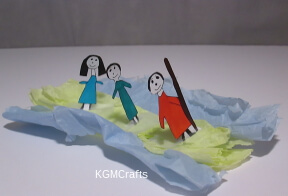
Fold the bottom of their feet a little and tape them on the yellow tissue paper, so they stand up.
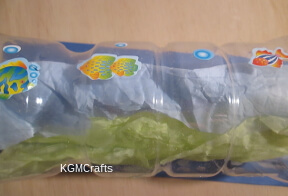
Put the tissue papers with the people in the container. The people should stand up, If they don’t, then use your finger to push them up.
Decorate the sides of the peanut container with fish stickers.
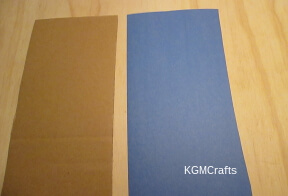
To make a stand, cut a piece of cardboard and blue paper the length of the side of the bottle. Glue with a glue stick.
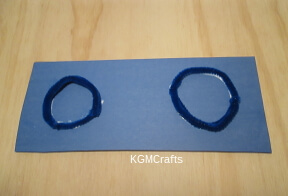
Blend two pipe cleaners into circles and use tacky glue to glue them to the cardboard. Let your stand dry.
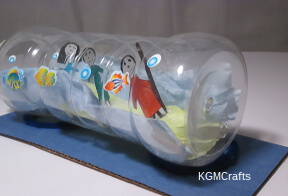
Finished scene!
2 Moses Bible Crafts
The Ten Commandments
Moses went up to Mount Sinai (Exodus 19). There God gave him the Ten Commandments (Exodus 20:1-21) on two stone tablets. The commandments were written with the finger of God. (Exodus 31:18).
Made with Sponges
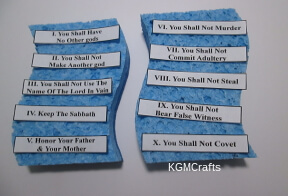
This is one of the easiest Moses Bible crafts. Just copy and paste.
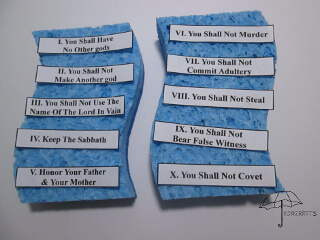
What you need;
- Two blue sponges
- Moses Bible Crafts PDF
- Glue stick
Print the Ten Commandments in PDF. Cut out. Glue five of them on each sponge.
Using a Bar of Soap
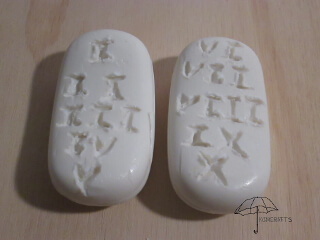
What you will need;
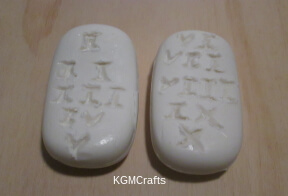
- Two bars of soap
- Knitting needle
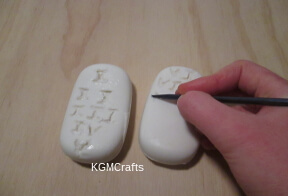
With your knitting needles, engrave Roman numerals. Five of them will be on each soap bar.
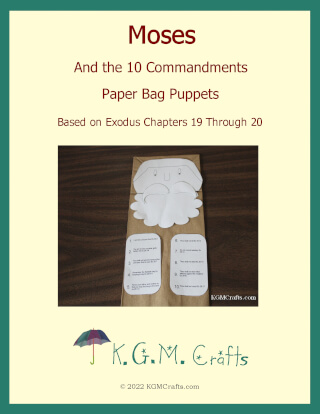
Kids can make a Moses puppet out of a paper bag. The FREE PDF is available at my Teachers Pay Teachers store.
Besides the puppet pieces, there is a short Bible story with some ideas on what Moses might say.
So, download your PDF. Find a 5 1/8 by 3 1/8 by 10 5/8 inch sized lunch bag. Make the puppet. Then have the kids put on a puppet show.
Moses Bible crafts are great for history, fun, or for making props for plays. You can read more about his life in Exodus, Leviticus, Numbers, and Deuteronomy. We hope you have enjoyed doing these crafts.
