Upcycled Santa Crafts for Kids
by Karen & Grace Morris
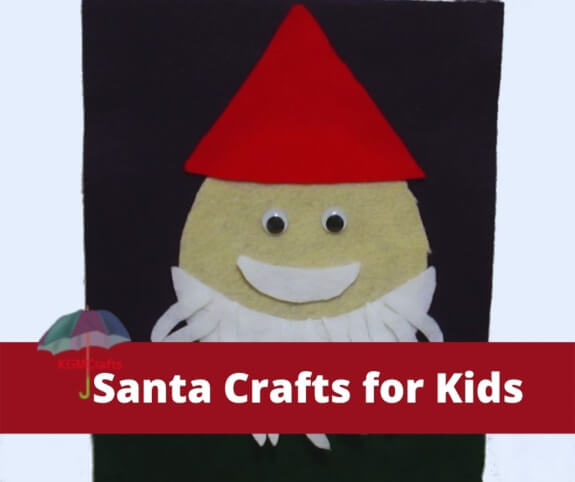
No need to go to the North Pole. Find materials to make these Santa crafts for kids in your home. Soon you will find this jolly fellow reminding you of Christmas cheer.
We have questions for you to answer in the introductions of each craft. Scroll down to find the answers.
Quickly find the Santa crafts for kids you want to make first by clicking the picture.
Ho, Ho, Ho
Have you been
a good
Girl or Boy?
A lot of the Santa crafts for kids use recycled materials!
Cardboard Tube Santa
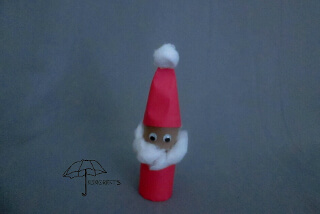
1. Why does Santa wear red?
To make this craft you will need;
- Toilet roll
- Two cotton balls
- Wiggle eyes (optional)
- Red paper
- Glue stick
- White glue

Cut a piece 2 1/2 by 7 inches of paper for the shirt. Also, cut a triangle from red paper. The base is 7 inches, the sides are 5 inches and from the base to the point is 3 1/2 inches. With a glue stick, glue the paper to the toilet roll.
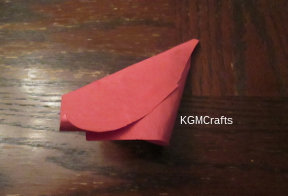
Glue the side of the hat together. Glue the hat to the top of the paper roll. Your points on the bottom will overlap some.
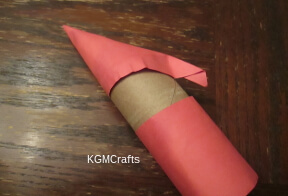
Pinch the back of the hat so that it is tight against the toilet roll.
Cut off the extra paper at the point.
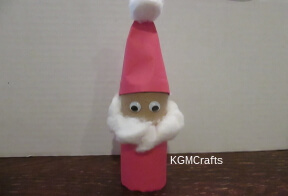
Glue on wiggle eyes or use a marker and make eyes.
Pull a cotton ball apart some so that it is in a long roll. Glue on the face for a beard.
Glue a cotton ball to the tip of the hat.
Santa Going Down the Chimney
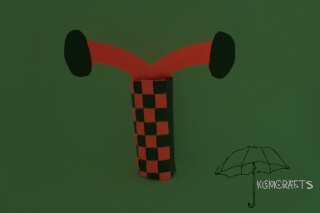
Here is another Santa craft for kids that use a cardboard tube.
You will need;
- Cardboard tube 4 inches
- PDF of Santa's legs
- Black construction paper
- Red construction paper
- Scissors
- Glue Stick
Cut your tube so that it is 4 inches by 2 inches. Or you could use a toilet roll tube that is the same size.
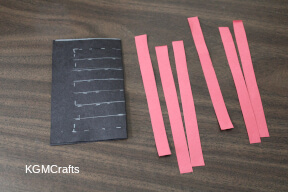
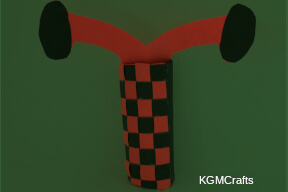
For the bricks, cut a 6 1 /2 by 5 1/2 inch piece of black construction paper. Fold the rectangle in half. Measure 1/2 inch from the top and bottom. Then measure 1 inch from the cut edge. Next, draw 1/2 inch lines between the top and bottom. Cut on the lines.
Cut eight 5 1/2 by 1-inch strips from red paper.
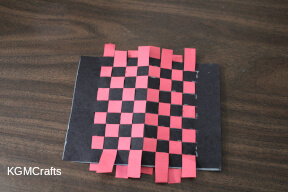
Weave the red strips through the cuts in the black rectangle. Glue the ends to the black paper. Trim the red paper.
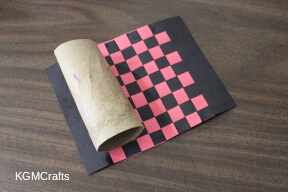
Glue the woven rectangle to the cardboard tube, leaving 1/2 inch on the top and bottom.
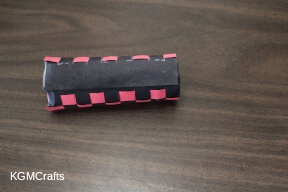
Glue the overlapping ends.
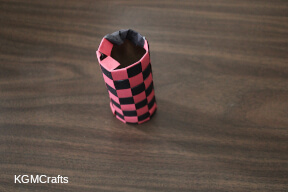
Fold the top and bottom to the inside.
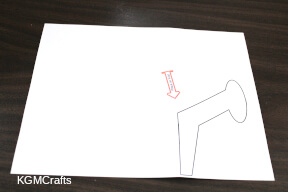
To make Santa, download and print the FREE PDF. Or you could make your own template. The directions are below.
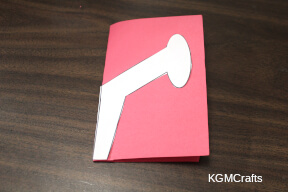
Place the body on the fold of a red piece of paper. Draw around the template and cut it out.
Or you could make your own Santa. Fold a piece of red paper in half. Starting at the bottom, draw a line 1/2 inch from the fold and 3 inches up. Then draw a 3-inch by 1-inch rectangle for the legs. The rectangle needs to angle from the fold. To make the boot, draw a 1-inch by 2 1/2 inch oval at the end of the rectangle. Cut the shape out.
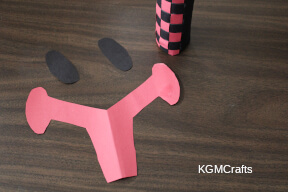
To make the boots, cut two ovals 1 inch by 2 1/2 inches from black paper. You could make four and glue them to both sides.
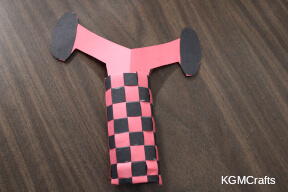
Place the body in the cardboard tube to represent Santa going down the chimney.
Plastic Lid Santa Crafts for Kids
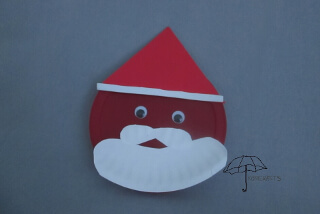
2. Why do we associate him with gift giving?
You will need;
- Red lid like what comes off a coffee can
- Wiggly eyes
- Craft foam
- Paper plate
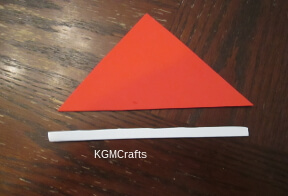
Cut a triangle from red foam. The base is approximately 6 inches. The sides are 4 3/4 inches. From the point to the base is 3 1/2 inches.
Cut a strip of white craft foam 1/4 by 6 inches.
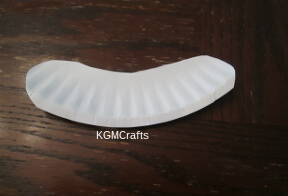
Cut 1/4 off the rim of a paper plate and round the ends.
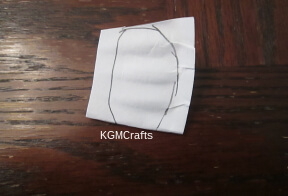
Also, fold a piece of the paper plate rim about 3 inches. Fold the piece in half and round the open end. This will be the mustache.
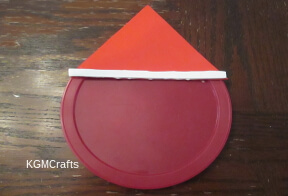
Glue the white strip on the red triangle. Glue to the top of the lid.
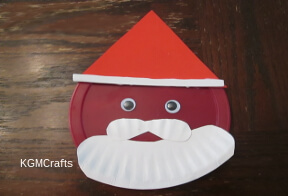
Glue the beard on the bottom of the lid.
Add the eyes and mustache.
Cookie Container

3. Why does he laugh a “ho, ho, ho”?
Supplies;
- 3 lbs coffee container with lid
- Cottage cheese container with lid
- White and red tissue paper
- Red felt
- Polyester fiber fill
- Tacky glue
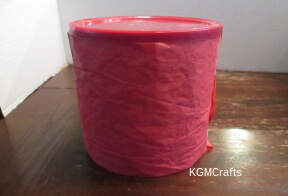
Cut a red piece of tissue 14 1/2 by 20 inches. Fold the paper in half. Tape the tissue to the side of the coffee container.
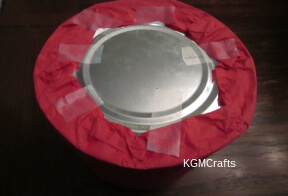
Fold the paper over the bottom and tape.
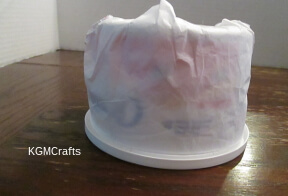
Cut a 7 by 14 inch of white tissue paper. Fold the paper in half. Tape the tissue to the sides and bottom of the cottage cheese container.
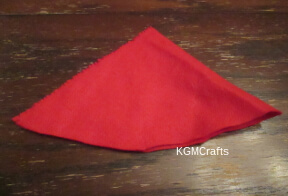
Cut a triangle piece of red felt. The bottom needs to fit around the cottage cheese container.
Sew the side of the felt from the point to the bottom of the hat.
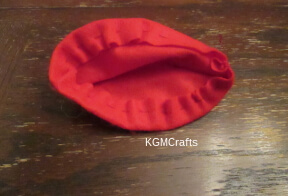
Fold the cut side up 1 inch and sew with a running stitch. Pull the thread so that the hat fits the head.
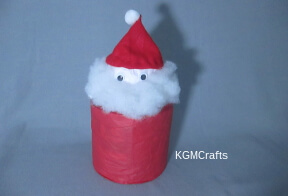
Glue the top of the cottage cheese container to the lid of the coffee can.
Don’t center it, but place it next to the rim of the coffee can.
Glue on wiggly eyes. Glue on the hat.
Make a beard with fiber fill. Glue on the sides of the cottage cheese container and on the lip of the coffee can lid.
Fill your canister with Christmas cookies. Set the canister on the table or give as a gift to someone special.
Red Santa Cup
4. Who makes Santa's toys?
What you will need;
- 1 plastic 18 oz red cup
- 1 cotton ball (jumble size)
- 1 small white pompom
- 1 tiny sparkly white pompom
- 2 wiggly eyes medium size
- Tacky glue
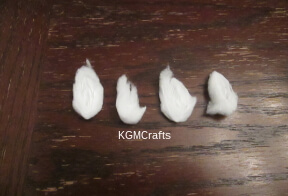
First cut your cotton ball in fourths.
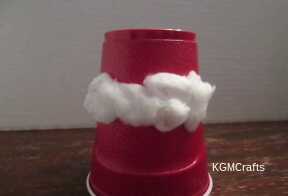
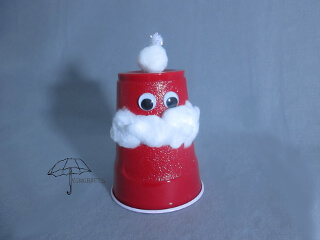
Glue it 1 1/2 inches from the bottom of the cup. This will be the beard.
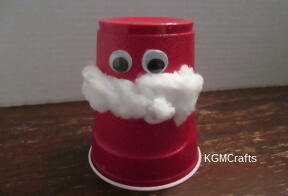
Glue your wiggly eyes above the beard.

Glue your white pompom of the bottom of the cup. Glue on the sparkly white pompom on the side of the white pompom to make the hat.
Advent Santa
5. Why do we give him cookies?
You will need;
- Purple, green, red, tan, and white felt
- Scissors
- Green thread and needle
- White glue
- Wiggly eyes
- PDF of Santa's beard
- Freezer paper
- Self-sticking Velcro
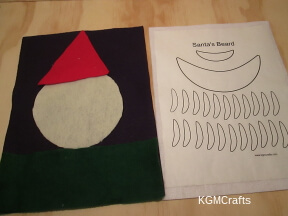
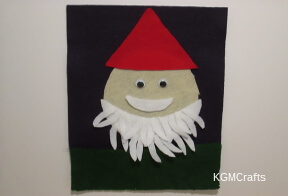
Cut a 9 by 3 1/4 inch rectangle from green felt. Cut a triangle with a 5 1/4 inch base and 4 1/2 inch sides from red felt. Cut a 5 1/2 inch circle from tan felt.
Copy the FREE PDF to the non-shiny side of the freezer paper. Place the shiny side of the freezer paper on the back of the white felt. Use a warm iron to melt the wax on the freezer paper, so it sticks to the felt.
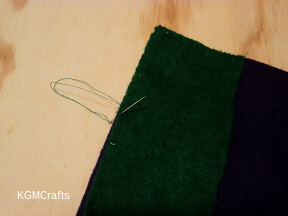
Place the green rectangle on the bottom of the purple felt. Sew around the bottom and sides of the green rectangle to make a pocket.
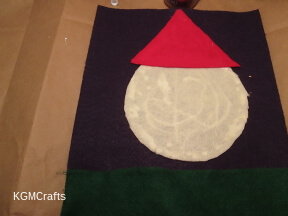
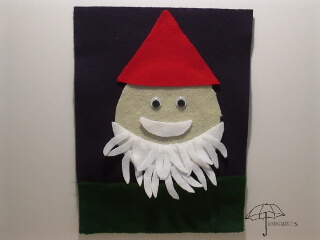
Glue the red triangle to the top of the tan circle. Glue to the top of the background piece. Glue on wiggly eyes on the tan piece.
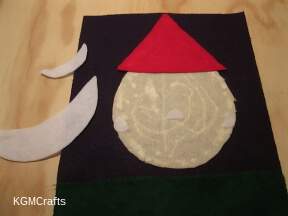
Cut the hook Velcro circles in half. Place the mustache on the tan piece of felt. Mark where you want the Velcro. Place the beard on the tan felt. Mark the sides for the Velcro pieces.
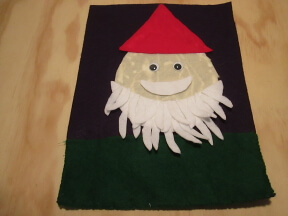
On the beard, add five Velcro pieces to the top and four on the bottom.
Place the beard pieces in the pocket. On the first day of December, take out the mustache and place on Santa's face. On the next day, add the bead piece. Day three, take out one of the long hairs and add to the beard. Continue adding hairs until the beard is full and it is Christmas Eve.
Easy Santa Crafts for Preschoolers
Although most of the Santa crafts for kids on the page could be done by preschoolers, here are two that are supper easy.
Painted Santa
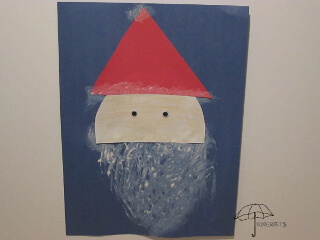
6. In which Christmas show has a train that takes young children to the North Pole?
Supplies;
- Blue, red, white paper
- Tan color crayon
- Wiggly eyes
- White glue
- White washable paint
- Paper plate or something to put the paint in
- Cardboard tube
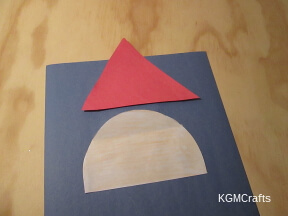
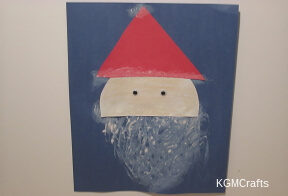
Cut out a triangle from the red paper for Santa's hat. Cut out a half circle from white paper.
Color the white paper tan.
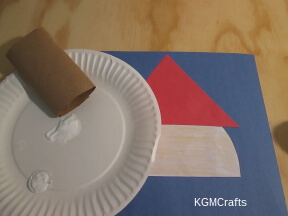
Glue the triangle to the curved part of the circle.
Glue the triangle and half circle to the top of the blue background piece.
Pour some white paint on the paper plate.
Squish the cardboard tube.
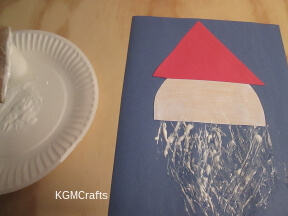
Dip the end in the white paint. Then stamp it on the bottom of the half circle and on the background piece. Continue dipping the tube in the paint and stamping it on the background in a triangular shape to make Santa's beard.
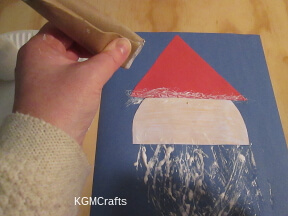
Bend the cardboard tube in half. Hold it flat, dip in the white paint. Use it to make the tassel on the top of Santa's hat and around the base.
Add wiggly eyes and let your picture dry.
Catch the Sun with Santa
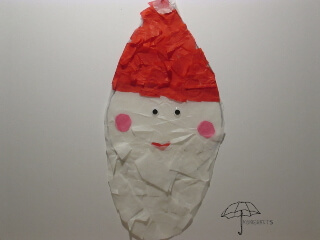
7. Why does he climb down the chimney?
You will need;
- Wax paper
- White paper
- Black permanent marker
- Red, white, pink tissue paper
- Scissors
- Glue stick
- Wiggly eyes
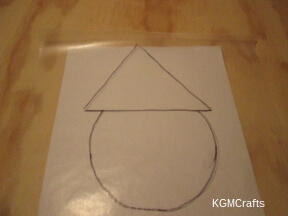
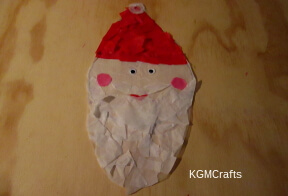
Cut a piece of wax paper that is approximately 8 1/2 by 11 inches. Place on top of the white paper. With the permanent marker, draw a triangle for the hat. Draw a circle under the triangle for the head.
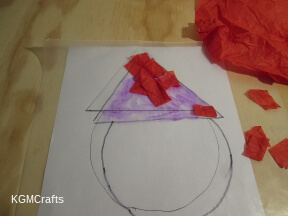
Cut small pieces of red tissue. Cover the hat with glue and add the pieces of red tissue.
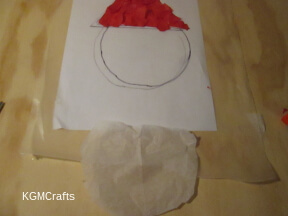
Cut a piece of white tissue that will fit next to the red triangle and will cover the circle. Glue on the circle shape.
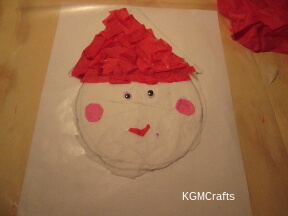
Cut two small circles from the pink tissue. Glue to the white face for rosy cheeks.
Cut a strip of red tissue for the mouth.
Add wiggly eyes slightly above and between the pink cheeks.
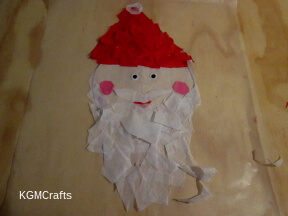
Add a small white rectangular piece under the red mouth.
Continue adding small strips of white tissue to the wax paper to make the beard.
Cut a circle from white tissue and add to the top of the hat.
At the bottom of the hat, add some more small red rectangles over the white.
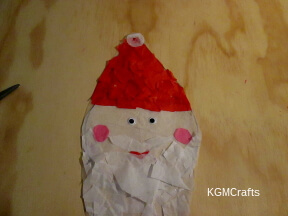
Trim off the extra wax paper.
Hang your Santa on the window and catch some sun.
Related: Easy Santa made with a craft stick.
One more question;
8. Is Santa his real name?
Answers to the Questions
We hope that you have enjoyed making Santa crafts for kids. Now here are the answers to the questions.
1. He wears read because of the poem A visit from Saint Nicholas.
2. Santa gives gifts because he is associated with Saint Nicholas (a real person) who secretly gave gifts in shoes that were left out for him.
3, He says, “ho, ho, ho” because he is a jolly good fellow.
4. The Christmas elves help make Santa’s toys.
5. Putting out cookies is a United States and Canada tradition. Some other countries, like Britain and Australia, put out beer and mince pies instead.
6. In the Polar Express, a boy does not believe in Santa.
7. It was said he climbed down the chimney if he found a door locked.
8. Santa has many names, such as Santa Claus, Saint Nicholas, Saint Nick, Father Christmas, and Kris Kringle.
Make some cookies and eat them with some milk near the fireplace with your Santa crafts for kids.
